Mersit Of The Raging Tree, catfolk swashbuckler/rogue ..... Aaron Collins
Taarn, kellid barbarian ..... Mick Hodorek
Ashen, elf bladebound magus ..... Mike Horrigan
Rupert Silvermoon, elf wizard ..... Jonathan Hood
Esdar (Dar) Aerril, half-elf cleric ..... Alex Nutall
We've gone down the stairs (after the snot check) and come to the western entrance of a large room with pillars. There's also lots of dirt mounds blocking our view though not quite packed to the ceiling (which is 15 feet high). The mounds are 8-10 feet high - looking like something burrowed up from below not from the ceiling (which looks fine). We all see some niches cut into the walls and a corridor leading east. As we move into the room the room to investigate, giant ants come out to attack.
INISH!
Mersit: readies
Ashen: readies
Ant 1: attacks Taarn
Taarn; attacks ant01, hits then rages and attacks again but misses.
<More ants come out - Ants2-5>
Rupert: Magic Missiles an ant.
Esdar: Spell of joy (9 rounds)
Mersit: chugs Haste potion (using Mythic) then attacks Ant5 and puts it down. Then he damages Ant3 (5 rounds for the haste)
Ashen: Two slashes to damage Ant4
Ant1: attacks but misses Taarn
Rupert: MMs for some damage
Ant2: Moves toward Taarn, Esdar and Rupert; damages Taarn
Ant3: misses Mersit
Ant4: Moves and attacks Ashen but misses;
Esdar: Hits ant2 and kills it;
Mersit: finishes off Ant3; moves next to Ant4 and does damage
Ashen: Moves to flank and kills Ant4
Taarn: overkills Ant1 with excessive damage
Mersit moves and hears a sound on top of the southern mound. He climbs up and once on top, a secret door opens and some mites come through. The mites talk to each other but we do not recognize the language. As usual, we assume hostiles.
Ashen: moves up to ready an attack;
Mite moves up gets hit by Ashen;
Taarn moves and readies an attack;
Rupert move up and readies an attack with sword
Mite6 moves up gets hit by Taarn;
Mites1 moves up and get crit hit by Rupert; misses the wizard
Mite3 moves up and hits Rupert
Esdar: moves up the mound next to Mersit; attacks Mite6 with sad (Mersit side eyes the cleric)
Mite2: flanks Esdar but miss
Mite Makes Rite
Mersit: gets blood lust and drops three mites
Ashen hurts Mite1
Taarn: attacks and damages Mite2
Rupert: used sword and kills Mite3
Esdar: attacks MIte2 and it drops dead
FINISH
Mersit and Rupert drop their backpacks climb through the secret entrances which is a tight tunnel (fine for mites). We come to a small room with no one inside but cheap mite tools (hammers and chisels). We go through another tunnel leading east that opens out to a raised section in the middle of stairs going north (up) and south (down). There's also an unhealthy amount of cobwebs around (slightly vibrating). M & R retreat back to the mounds to report.
Rupert takes out the shard to get our next direction: south and downward. Before we leave, we do a search of the "mound" room. We don't find anything significant but Esdar finds a secret door on the southern wall. Rupert goes in to check it out and finds that it leads to the cobwebby room that Mersit and Taarn had found earlier.
Taarn and Ashen check out the eastern corridor and see that it leads south as well. We decide to go that route instead of the secret door route. We move southward until we come to a landing at the top of a set of stairs. As we look around, we find another secret door leading to that cobwebby middle area. We continue on our original southern direction down the stairs (from which we can see an area open up with more pillars and webs in a trash strewn room).
We go down to the bottom of the stairs - we see more of the room. Taarn moves into the room, the webbing bugging him… as he moves in the room explodes with enemies! Mites and Spiders!
INISH:
Mite1: climbs onto Spider1
Taarn: Rages and attacks the spider (with Mite mount); killing the arachnid… The mite sinks to the ground
Ashen: Moves up to dig through the goo and attacks the mite (crit!);
Mite2: retreats to talk to Mite 7
Esdar: Move up ; flings icicle at Mite1;
Rupert: finally unleashes the fireball into a group of Mites; burning most of the mites dead and clearing the cobwebs
Spider2: webs the Taarn but he avoids immobilization
Mersit: uses Cloak to vanish and moves behind the spider.
Taarn: Moves up and smashes the spider into goo; then swings at the last Mite… destroying it.
FINISH
After wiping up Mite-stuff off our weapons, we move to the west until we come to another set of stairs. We go down to the bottom and see it split into corridors going west and south.
Rupert discerns we need to go southwest so that was useful but we continue south for now. The webbing is getting thicker in these parts so Taarn leads the way by burning away the webbing with a torch. We eventually come to a large room where the webbing is so thick that even Taarn can't burn it all away. We light another torch so Mersit can help Taarn burn a path (a ten foot path) . We go forward another 30 feet when more spiders drop down surprising us. Ick.
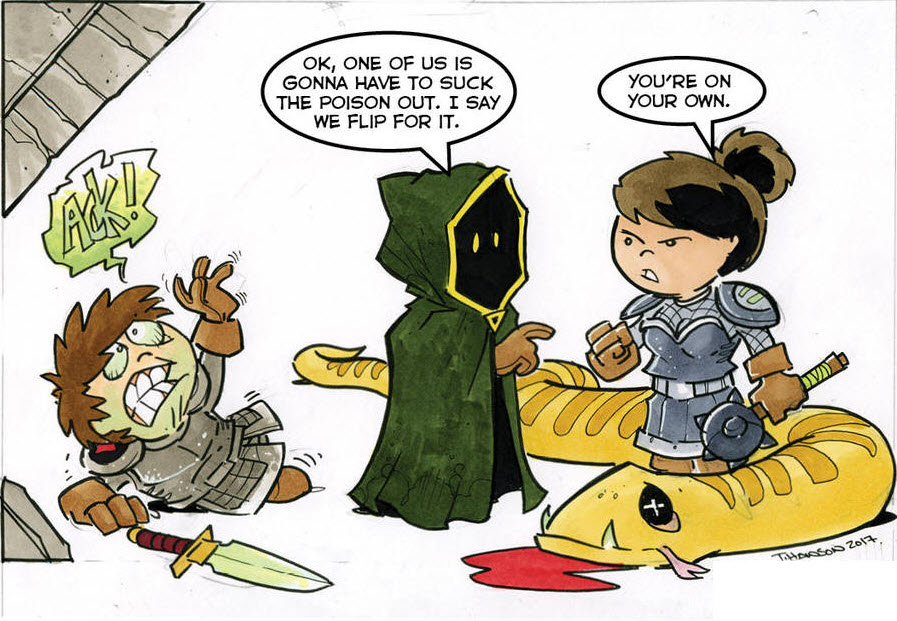
Surprise: The spider bites Esdar who succumbs to STR poison; They also try to bite Rupert but they miss.
INISH
Mersit: Attacks Spider1: misses and then hits for damage.
Taarn; Moves into a web square; burning it away then dropping his torch; he hits Spider2 successfully.
SPider2: attacks Ashen, misses then tries to escape but is hit by Taarn, killing it.
Rupert: move back and fires some force missiles.
Esdar: Charge off the lightning rod against Spider 1 hitting it to death.
FINISH
Esdar is still suffering from the poison and losing STR rapidly.
“Blue, glowing fungus grows in numerous patches across the walls of this large chamber. To the east, a shadowy balcony overlooks the room at a height of ten feet, while in the center of the room a wide spiral stairwell descends into the darkness. A second flight of stairs descends along the western wall.”
The patches of glowing blue fungus are cytillesh, a toxic fungus that causes birth defects and madness—and constitutes one of the staples of derro diet and alchemical research. A patch of cytillesh provides bright illumination to 20 feet. Every 24 hours a creature spends in this illumination it must succeed at a DC 15 Will save (+1 to the DC for each previous save) to avoid taking 1d4 points of Wisdom damage, to a maximum equal to 5 less than its normal Wisdom score. Further failed saving throws once this limit is reached cause lingering madness, such as those detailed in the GameMastery Guide. This is an insanity effect, and as such, derros are immune.
The stairs along the northwest wall lead down to Khrysm's Laboratory. The spiral stairs in the middle of the room lead down much farther than that—after descending for nearly 400 feet, they suddenly end at an open gulf, exiting into the roof of a large cavern filled with all manner of deadly fungi and creeping oozes. It's an 80-foot drop to the floor below—this cavern is one of the chambers of the upper reaches of the Darklands known as Nar-Voth. It is from this route that the derros first came to the region (with their leader Khrysm granting them all the effects of levitate), but further details are beyond the scope of this adventure.
The secret door leading to the Forgotten Corridor can be found with a successful DC 30 Perception check—but a character who carries the Shard of Pride feels a sudden urge to search this portion of the wall as soon as he enters the Derro Vault, gaining a +10 insight bonus on that Perception check as the urging to proceed toward the Shard of Greed compels him forward.
Journals: The source of the vanishings that have plagued Magnimar can be found here, in this room and its adjoining chambers. A group of four derros, led by a witch named Khrysm, have come to Magnimar via the deeper caverns below. For several months, they've been using the eastern tunnel from Sewer Falls to abduct stock for their experiments. The majority of their victims are subjected to hideous procedures (most of which involve vivisections and other studies the derros hope will provide a solution to their aversion to sunlight) before having their minds wiped clean via poison and magic, at which point they're returned to Magnimar's streets, typically with enough Wisdom damage from cytillesh exposure that they're barely able to function on their own.
The derros are each responsible for their own specialized type of experiments carried out in the adjoining rooms. They use this large central area for meetings , particularly to discuss tactics for upcoming raids. The first time the PCs approach this room, that's what three of the derros are doing here—arguing in Aklo about the best type of victim to abduct (their leader, Khrysm, remains in her laboratory for now). If the PCs approach stealthily, they find the derros finally coming to an agreement about abducting several fishermen from a Dockway tavern. If the PCs wish to ambush the derros at this point, the derros take a -4 penalty on Perception checks. Alternatively, if the PCs wait, the three derros split up to their own rooms, allowing the PCs to pick and choose whom they fight.
The derros are named Caedimus, Portioque, and Atlatia—see areas following for information about each's personality. The three are bitter rivals; each believes hisor her own specialty represents the best approach, and they argue bitterly even in combat. If one of the derros is defeated, the other two immediately break off combat and flee to their respective chambers, planning on utilizing their own personal defenses and guardians in each room to increase their own chances of survival rather than rely upon each other.
CAEDIMUS'S LABORATORY
“This twenty-foot-square domed chamber contains a juryrigged pair of low operating tables, complete with leather straps at both ends to hold the patients down. It holds vial after vial of preserved specimens along shelves in the wall. The second room contains an office and bedroom. Journals written in Undercommon are stuffed in bookshelves. Papers of various notes and maps litter the desk.”
Journals: Caedimus is most interested in how the body decays after death sets in—the derro believes that this decay is linked to the decay that derros suffer in the sunlight, and if he can find a way to retard or reverse the decay, he can adapt that solution to the larger problem. His primary subject has been a hunch—backed carrion golem he found in the caverns deep below—a creature the derros captured and whom Caedimus has managed to surgically reprogram so that it thinks of Caedimus as its father. To date, the derro has not been able to discover why the carrion golem's body refuses to rot further—a failure he is ever more frustrated by. Caedimus is by nature a loner, and only associates with the other derros because of strength in numbers.
Treasure: The surgical tools, while filthy, could be cleaned up; they are of quite good quality, and are worth 200 gp as a set. The Journals and specimens together represent a vast representation of underdark flora and fauna. Used as a reference, it grants a +2 on any knowledge nature or dungeoneering checks specific to flora and fauna of the underdark. Taken as a whole, after being properly catalogued, and to the right buyer it could fetch as much as 10,000 gp.
PORTIOQUE'S LABORATORY
“The corridor splits and ends in two equally sized square rooms—a bedroom to the northeast and some sort of abattoir to the southwest.”
Journals: The room to the northeast is the home and study of the derro Portioque. His favored theories on the nature of the derro vulnerability to sunlight is that the decay is caused by warmth, and that by protecting or canceling the sun's heat, a derro could exist with comfort under those deadly rays. The room to the south has several haunches of meat kept at a freezing temperature due to the presence of a patch of carefully cultivated brown mold. Whenever Portioque gets a living victim, he alternates his experiments between exposing the victim to the mold and then pulling it back from the brink of death, and injecting victims he keeps bound in his room with solutions of distilled brown mold spores mixed with various bodily humors extracted from previous victims or himself.
Portioque fancies himself an alchemist, and has studied the effects of various bodily humors for many years. To date, none of his subjects have emerged from their torments alive, and as such the other derros are hesitant to allow him to take the lead on experiments, knowing full well that victims who aren't returned to the surface are more likely to arouse unwanted attention. Embittered and vile, Portioque prefers to fight with a sinister weapon called an injection spear (see below) he keeps loaded with 5 doses of his own brew of brown mold spores—a concoction he calls frostspore (see below).
Treasure: An alchemist's lab, used primarily for distilling the inherent qualities of bodily fluids, sits on a table in Portioque's bedroom. His greatest treasure, an extraction scarificator (see below), sits amid the lab's components. In addition, 7 more vials of frostspore sit nearby.
ATLATIA'S LABORATORY
“This square room seems to serve a dual purpose as a bedroom and a torture chamber.”
Journals: Atlatia takes a less invasive approach to her researches—she believes that the key to defeating the killing rays of the sun lie in the minds of those who live on the surface. She uses a wand of charm person and noninvasive (but nonetheless painful) surgical torture to break the minds of her victims, then subjects them to extensive interrogations and thought-expanding injections of various drugs and toxins to try to navigate the pathways of the surface-dwelling mind. Alas, her own madness means her interrogations follow a recursive pattern that frequently drives her victims permanently mad, forcing her to replace her subjects with new ones.
“A curved hallway stretches to the left and right, with stone cell doors lining the inner wall.”
These cell doors are used to keep recent prisoners the derros haven't yet started work on. Currently, six of these cells contain hapless, unconscious victims snatched fromthe streets of Magnimar—these NPCs can be significant characters the PCs have encountered, named NPCs from Magnimar: City of Monuments, or merely unfortunate citizens. Rescuing these prisoners is a part of Lord Mayor Grobaras's mini-quest (see the inside cover of this book).
The door to any cell containing a prisoner is locked (Disable Device DC 30 to pick the lock); Khrysm carries the keys to these doors. The prisoners are naked, and any gear they may have been captured with is kept in Khrysm's Laboratory.
FORGOTTEN CORRIDOR
“A curving stairwell shrouded in tattered cobwebs and a thick layer of dust extends into the darkness. A bulky cobweb shrouded shape looms in an alcove directly to th e east.”
These stairs wind 250 feet down into the dark, eventually leading to the Sihedron Shrine. The large bulky shape is a long-dead and well-preserved shriezyx—a monstrous, spiderlike aberration. A successful DC 14 Knowledge (dungeoneering) check is enough for a PC to recognize the dead thing for what it was, while a PC who succeeds at a DC 14 Knowledge (history) check recalls the event in 4623 AR in which swarms of these creatures clambered up out of the Irespan to menace Magnimar—an event that caused the lord mayor to issue a ban on quarrying the Irespan's stone.
KHRYSM'S LABORATORY
“This large room is set up as a crude alchemical lab—planks laid over barrels and crates serve as tables, but the alchemical gear set upon these crude tables appears to be quite high quality.”
Journals: This room has been claimed by the leader of the derros—a derro magister named Khrysm. An unabashed hedonist, Khrysm seeks to experience the full range of mortal sensations both personally and by observing others. She is a master torturer and has learned to use her aklys, drugs, alchemical skill, and inhuman instruments of her own design to bring victims to the heights of pleasure and the depths of agony again and again until they eventually go mad. The victims who survive are broken shells of who they once were—if indeed Khrysm deigns to leave any memories intact at all. She has largely abandoned the pursuit of discovering a cure for derro sunlight vulnerability, instead viewing her role as a magister as affording her the luxury of exploring the realm of pleasure and pain while her underlings toil on more immediate concerns.
Khrysm is attended by a pair of homunculi she created with the aid of long-dead allies from Nar-Voth—both creations look like tiny, bat-winged duplicates of the derro magister herself, and are completely loyal to their mistress.
Treasure: The equipment on the table constitutes a masterwork alchemist's lab. The northeast room serves as Khrysm's personal chambers—in addition to a large mound of cushions and blankets, she keeps her supply of cytillesh extract (the toxin she brews and uses to ensure that victims the derros are done with have no memories of their time as experiments) here in a wooden case—there are currently 3 doses of cytillesh extract. Any gear taken from prisoners is stored in the northwest room, along with several bags of coins the derros have taken from previous victims. In all, this area contains 232 pp, 1,423 gp, 2,100 sp, a lens of detection, a golembane scarab, and a wand of spiritual weapon (11 charges).
SIHEDRON SHRINE
“The room shines with a golden light emanating from crystals embedded in the domed ceiling. The entire dome is painted in reds and golds depicting the glory days of ancient Thassilon and remain as pristine as if the pigments were just laid. An altar shaped like a seven-pointed star sits in the center of the room—a smaller seven-pointed shape has been carved into the center of this larger block of stone. Sitting in one of the star's arms is a shard of black metal.”
This secret vault was used by Runelord Alaznist not only to hide the adamantine Shard of Greed she stole from one of Karzoug's vaults long ago, but to house a potent creation of her own she built in secret—the stone itself is a Sihedron Shrine, a replica of the one King Xin used to first create the Sihedron. The indentation in the center of the Sihedron Shrine is sized perfectly to fit all seven of the Shattered Star shards—with the proper ritual and magic, this stone can be used to rebuild the Shattered Star!
Creatures: Alaznist once kept much more powerful guardians in this room, but when Thassilon began to fall, she called the more dangerous of them from this room to her side, leaving behind only a pair of particularly large but (in the grand scheme of things) not so particularly powerful monsters—spiderlike horrors called shriezyx. Citizens of Magnimar know these monsters as the strange beasts that swarmed out of the Irespan back in 4623 AR. These two shriezyx have remained in temporal stasis since the fall of Thassilon, but as soon as the door to the room is opened, that effect ends and restores the two monsters to animate life. They have no idea that Thassilon has fallen, and assume the PCs are agents of Karzoug come to reclaim the Shard of Greed—they accuse the PCs of this in Thassilonian as they swiftly move to attack.
Being in such close proximity to both the Shard of Greed and the Sihedron Shrine for millenia has had its effect on these monstrosities. Both have absorbed some of the energy imbued in these artifacts that has, over time, turned them into Mythic beasts.
Treasure: The Shard of Greed lies atop the Sihedron Shrine, nestled in one of the arms of the indented Sihedron.
An extraction scarificator is a horrid variant of the more common bloodletting device used by healers and doctors. An extraction scarificator can be used only on a willing or helpless target. When placed against exposed flesh, the extraction scarificator's blades deal 1d4 points of damage plus 1d4 bleed. Once per day, an extraction scarificator can be used to extract and concentrate one of the four bodily humors from its target as well. The humor to be extracted can be adjusted as needed, and must be immediately poured into a potion vial or the extracted humor is lost. Extracting a humor takes a variable number of rounds—as soon as the victim has taken a total of 6 points of damage in all from the bleed effect, the extraction is complete. For 24 hours after extraction, this purified humor has an additional effect, functioning as one of four potions as listed below (all function at caster level 3rd).
Brewed from the spores of the glowing blue fungus called cytillesh (or "brain mold"), this extract is often used by derros to cloud minds and instill amnesia in their victims.
Cytillesh Extract poison—ingested; save Fortitude DC 18; frequency 1/hour for 8 hours; effect victim loses all memory of events that took place in the previous hour and cannot form new memories as long as he remains poisoned—after he recovers, the time spent poisoned (plus the hour before his poisoning) is simply missing from memory (these missing memories might return later as dreams, and can be returned with a restoration or heal spell); cure 2 saves; cost 800 gp.
FROSTSPORE
This blend of brown mold spores in a pale blue solution feels cool to the touch.
Frostspore poison—ingested or injury; save Fortitude DC 13; frequency 1/round for 6 rounds; effect 1d6 cold damage plus staggered for 1 round; cure 2 saves; cost 100 gp.
INJECTION SPEAR
This exotic two-handed weapon allows the user to inject targets with liquid on a hit. The spear's reservoir can hold up to 5 doses of a single fluid—a single dose is automatically injected when the spear hits a target. A non-proficient user can wield an injection spear as a standard spear but cannot trigger the injection. An injection spear is otherwise identical to a normal spear, save that it cannot be thrown, weight 8 pounds, cannot be used to brace, cost 60 gp.
BLISTERCAP SPORE
Found in remote regions deep underground, the blistercap takes its name from the blisters on the bruise-colored cap atop its stem, which weep a toxic yellow fluid. The spores it produces often contribute to the dangers of underground exploration.
Blistercap Spore poison, contact; Save Fortitude DC 20, Frequency 1/round for 6 rounds, Initial Effect 1d2 Dex drain and 1 Con drain; Secondary Effect sickened for 1 minute; Cure 2 consecutive saves; Cost 1,125 gp.
BLOODBRAIN VENOM
The morlock creepers brew a potent and fragrant poison harvested from the bright red sap of brainshaped mushrooms that flourish in the lower caverns. Creatures struck by the poisoned darts are marked with a pungent fungal aroma for 10 minutes, even if they succeed at their Fortitude save. The scent is particularly potent to morlocks, allowing them to detect creatures tainted by it with their scent ability at a range of 100 feet even in the still air of the caves. The smell can be scrubbed off as a full round action with an alkalai substance, such as milk or soap. Cost 400 gp.
BLOODROOT
Bloodroot injury; Save Fortitude DC 12; Onset 1 round; Frequency 1/round for 4 rounds; Effect 1 Con damage and 1 Wis damage and confusion 1 round; Cure 1 save; Cost 100 gp.
GELIDBURN OIL
This greasy pale-blue liquid delivers a shocking sensation that is both freezing cold and searing hot.
Gelidburn Oil poison, injury; Save Fortitude DC 12; Frequency 1/round for 4 rounds; Effect 1d3 fire damage, 1d3 cold damage, and staggered 1 round; Cure 1 save; Cost 75 gp.
PURPLE WORM POISON
Purple Worm Poison injury; Save Fortitude DC 24; Frequency 1/round for 6 rounds; Effect 1d3 Str damage; Cure 2 consecutive saves; Cost 700 gp.
The Shard of Pride is made of coppery horacalcum (a skymetal). As long as the Shard of Pride is carried, its owner can use major image as a spell-like ability once per day, gains a +2 insight bonus on saves versus illusion spells, and gains a +2 insight bonus on all skill checks.
Curse: The owner suffers delusions of grandeur, and is sickened whenever she must serve another creature as a subordinate of any sort for as long as that arrangement persists. She cannot gain the benefit of the aid another action, nor can she take the aid another action.
Neutralization: The curse is neutralized once a scarlet-and-blue sphere ioun stone is placed in the indentation. As soon as one is placed it fuses with the shard and becomes the same material. All benefits of both the shard and ioun stone are active as long as it is carried (even in a Handy Haversack).
The Shard of Greed is made of black adamantine (a skymetal). As long as the Shard of Greed is carried, its owner can use haste as a spell-like ability once per day, gains a +2 insight bonus on saves versus transmutation spells, and gains a +1 insight bonus on attack rolls.
Curse: The owner becomes greedy, and is sickened whenever she is not wearing at least 500 gp per Hit Die in non magical jewelry and fine clothing. Each time the owner sells a belonging or gives one away, she must succeed at a DC 20 Will save or take 1d4 points of Wisdom damage.
Neutralization: The curse is neutralized once a pale blue rhomboid ioun stone is placed in the indentation. As soon as one is placed it fuses with the shard and becomes the same material. All benefits of both the shard and ioun stone are active as long as it is carried (even in a Handy Haversack).
Once again you find yourselves on a grey featureless plane that stretches on, seemingly forever. Each of you is wearing your idealized outfit; Taarn in the simple clothes of a Kellish barbarian with Tenebris in hand, Mersit in dashing sailor clothing, Rupert in scholars clothes, Esdar in a flowing robe tied about the waist with sandals and Ashen dressed like an aristocrat—the shadow of a large sword hangs from his belt with wisps of shadow flowing from it to an equally shadowy humanoid figure, head bowed, that stands just behind and to the side.
You are arranged in a semi-circle roughly 10' in radius, facing what looks like a featureless humanoid figure composed entirely of fog, its head bent forward. On the opposite side of this figure is a beautiful woman with auburn hair wearing a courtly gown. She appears to be taking this all in—including recognition at seeing you five.
The featureless figure in front of you raises its head and speaks in a voice that is a melange of speakers, young, old, male, female yet conveys meaning and…the cold touch of the grave. “I am glad you seven are here.” With that it raises its arm and points at each of you five, the woman and the shadowy figure. “There is much you should know and little time to tell.”
“First, let me say that what happened to you was not my fault. I could not have foreseen this particular chain-of-events those many millenia ago.” it clasps its left hand around its right wrist and continues. “The secrets hidden at Kaer Maga hold power and knowledge long forgotten before even I was born.” it pauses for a moment, looks down then back up once again. “Alas, the Alara'hai…that is, the Seven Swords of Sin were a direct result of my not paying better attention to the children.”
It lets go its wrist and points directly at the woman. “If she is the instrument by which this chain-of-events began, you six are its catalyst!” At which point it points back across your semi-circle. “She collected the seven swords and brought them to that place of power. You broke the restraining crystals allowing all of their energy to be released when your magical duels forced the controlling orb to overload and flood your bodies…” it pauses and nods at the shadowy figure “Pardon my misspake” it gives its head a shake to the right then continues. “…your entities with the artifact energies those blades contained, ascending each of you without your knowledge or petition. This makes you seven somewhat of an anomaly to the divine beings that normally control such ascensions.”
At this point it looks off to its far right and snaps its head forward again. “Ah, they have found us. Time is short. Find the next two shards and complete the trials by defeating the guardians. You will need to work together. We will meet again then. Go! Now!”
Here are the room descriptions and any handouts I missed during your exploration of The Crow. The following is presented in the order encountered.
Catacomb
Ant Mounds
“This wide catacomb chamber has rows of burial niches cut into the stone walls. These have all been stripped bare of any former occupants. Half a dozen ten-foot-high mounds of dirt and debris dominate the floor of the chamber, reaching nearly to the ceiling fifteen feet above.”
Giant Ants
Expansion Project
“This irregularly-shaped room seems to have been chiseled recently out of the surrounding rock.”
Mites
Spider Ambush
“The ceiling of this roughly octagonal room is shrouded by thick sheets of tangled webbing. The secret doors to the east and west represent the height of mite engineering—a successful DC 12 Perception check is needed to notice either one.”
Giant Black Widow Spider
Secret Door
“As with the secret doors in Spider Ambush, only a DC 12 Perception check is required to notice the secret door in the wall here.”
Mite Den
“Thick sheets of spider webs hang from the walls and ceiling of this filthy rubble and trash-strewn room. In places, the rubble and garbage have been heaped up into mounds and shapes that almost look like undersized furniture—beds and tables and chairs sized for small humanoids.”
Mites and Giant Spiders
Stairs Down
“These wide circular stairs descend 30 feet to the floor below.”
Dungeon
Dungeon Entrance
“This dank stone hallway is increasingly choked with spiderwebs to the south, while to the west they thin quickly.”
Assembly Hall
“This wide hall is lined with pillars, between which hang thick sheets of webbing. These do not seem to be the older, dusty cobwebs of the corridors, but rather fresh webs. The brittle carcasses of several albino crickets the size of small dogs hang among the tangle.”
Giant Spiders
Kitchen
“The chamber opens out in a wide half-circle. Giant brick ovens have been built into the curved wall, and fire pits outfitted with multiple spits for roasting are set near by.”
Main Storeroom
“Ancient shelves hold only the dust of whatever foodstuffs were once stored here. In the alcoves to the south, iron hooks for hanging meats dangle from the ceiling. The secret door to the west can be found with a successful DC 20 Perception check.”
Runed Skeletons
Meeting Hall
“A damp natural grotto opens up in the earth here, its stone ceiling rising forty feet above. Fat columns of brick support the northern end of the room, and the floor of the southern end has been carved into a low dais upon which stands the moldslick statue of a beautiful woman wielding a ranseur.”
Clickylegs - Advanced Cave Fisher
Empty Barracks
“This room seems to have once served as guard barracks, but the beds and other furniture here have long since crumbled into almost unrecognizable ruins. The southern corridor leads to a series of stairs that descend to a lower level.”
Thassilonian Laboratories
Ancient Welcome
“A red statue of a beautiful woman armed with a large ranseur stands in the center of this chamber. Slime cakes the floor. A PC who succeeds at a DC 25 Knowledge (history) check recognizes the statue as being of Runelord Alaznist.”
Huge Abyssal Larva
Mindless Guardians
“The bare stone floor of this room overlooks a stair that descends to the south.”
Nupperibos
First and Second Thassilonians
“A pillar stands at either end of this wide room. The northern pillar is carved with the image of a beautiful woman wielding a ranseur. The southern pillar depicts seven robed men and women, their features eroded with the years. Each of them holds one segment of the seven-pointed star. Strange runes are carved into the floor.”
“The runes are in Thassilonian and ask, "Does true power lie within the one or the many?" A DC 25 Knowledge (history) reveals that the northern pillar depicts Alaznist, the Runelord of Wrath, while the south pillar shows the seven original runelords after they sundered the Shattered Star.”
Anyone touching the north pillar receives a +1 insight bonus on attack rolls, weapon damage rolls, saving throws, skill checks, and ability checks for 24 hours. A person who touches the southern pillar instead receives a -1 penalty on the same checks and rolls for 24 hours. A person who touches both pillars cancels the effects of each out. Both effects can affect a person only once.
Occupied Guardroom
“The smell of the sea is strong in this room, and salt encrusts the floor in a trail leading from the south door. The door to the east has been barricaded from within, and forcing it open requires a successful DC 22 Strength check. Up to two people can work together to open the door.”
Nupperibos
Stink's Redoubt
“The walls of this chamber have been coated in dried black ichor. Rudimentary lines and smears within the layers of gunk have been added to create crude examples of simplistic art.&requo;
Stink - Large Advanced Lemure
The Sea Stair
“The salty tang of the sea fills the air of this chilly room. Wall carvings showing soldiers marching to war are encrusted with salt, and a descending stair in the center of the room is filled to nearly floor level with sea water. A thin layer of blue energy shimmers across the surface of the water in the stairwell.”
These stairs lead outside The Crow under 60 feet of water. This is where the wreck of the Liza Jane lies.
Liza JaneReefclaws
Underwater Observation
“A spiral stair rises from the center of this otherwise empty chamber leading up to a domed chamber some twenty feet above. Three permanent walls of force (CL 15th) serve as windows that look out to the west across what is now Outcast Cove. The view is somewhat murky, and seaweed growing up from the sides of the tower serves as billowing curtains that sometimes block the view, but during the day the wreck of the Liza Jane is visible with a successful DC 15 Perception check. From outside, noticing the windows beyond the seaweed curtains requires a successful DC 20 Perception check.”
Defective Trap
“This chamber is bare save for a statue depicting a regal looking woman wielding a ranseur—she stands in a battle ready pose, with the tip of the ranseur aimed at the northern entrance to the room.”
This was a fireball trap until Taarn smashed the hand and ranseur rendering it deactivated.
Hall of Fleshwarping
“A line of pillars runs down the center of this hall, between which lie the ruined remains of what was once an immense magical laboratory. Crumbled tables, broken stone urns, rusted cauldrons, and ancient fragments of broken glass lie scattered throughout. The northern wall depicts a vast mural of armies of deformed monsters and demons gathering on the shores of a mountainous island. Above, a woman's face has been carved into the mountaintop, and an immense bridge arches out from just below this woman's face. Below the mountain, at the end of a side view of a tangled network of caverns, lies a vast underground vault in which an immense monstrosity of tentacles surrounds a central fanged mouth; within the mouth glares an angry red eye.”
The tangle of broken and ruined equipment on the ground functions as difficult terrain. The mural on the northern wall depicts the armies of Bakrakhan on the shores of what is known today as Hollow Mountain—Knowledge (geography) DC 20 to recognize, while the monster that dwells in the caves deep below is a representation of one of Runelord Alaznist's most powerful allies, the nascent demon lord Yamasoth—who can be identified with a successful DC 30 Knowledge (planes) check.
Rift Siphon Labyrinth
“The walls, floor, and ceiling of this curving 15 foot high corridor are sheathed in rusty plates of iron that have been bolted in place. Scorch marks mar this armor plating at periodic intervals, and the gnawed fragments of blackened bones are scattered here and there. Row after row of tiny runes have been etched into each iron plate.”
This entire room is a complex magical item, and radiates strong conjuration magic. A PC who can read Thassilonian and succeeds at a DC 20 Knowledge (arcana) check can deduce that the entire chamber is built to be some sort of device to focus planar energies, with the layout of the walls and their rune-infused iron plates designed to create a thin spot between the planes at the center of the maze. A PC who succeeds at a DC 20 Knowledge (planes) check confirms that the rift siphon is currently focused on Avernus, the first layer of Hell.
The rift siphon can be closed relatively simply, as a successful DC 25 Spellcraft check (after careful study for at least half an hour) confirms. By prying no fewer than 10 iron plates from the walls (no two of which can be closer than 10 feet apart), the entire device can be ruined. Prying an iron plate from a wall requires a successful DC 24 Strength check (up to two people can work together on this)—destroying an iron plate (hardness 10, hp 10) also works. Each time a plate is destroyed, there's a 10% chance that the surge of energies causes some kind of event.
Advanced Hell Hounds
Southern Guardpost
“Two flights of steps descend into a wide pool of murky water in this room. Pillars carved to look like coiling tentacles support the vaulted roof, rising from the pool to the north and south.”
The pool of water in the room is 10 feet deep.
Aquatic Sinspawn
Ancient Sewers
Sewer Entrance
“A short flight of stairs leads down to a thirty-foot-square chamber with a cistern filled with dark water taking up most of the floor. Troughs of this dark water run east, west, and south through hallways alongside five-foot-wide walkways. Soggy timbers have been draped over the gaps to provide unstable looking bridges over the troughs. An ornamental torch made of onyx burns in a sconce next to a hallway heading east, from which the distant sound of someone singing with a raspy throat wafts down the hall.”
The Lost Captain
“A stone bridge supported by stone pillars curves through this cylindrical reservoir. A few feet below the bridge, dark water fills the room. The walls within a few feet of the water's surface have been painted into a remarkable mural that depicts the skyline of Magnimar, complete with numerous ships seeming to float on the waters of the room.”
If the PCs manage to reach this room without being noticed, they'll catch the chamber's occupant floating in the water and singing a song about worms and corpses as he works on adding a new ship painting to his constantly evolving mural. This room is the den of a lacedon who, in life, was a fisherman named Lockerbie Brast, captain of the Liza Jane. He was already suffering from ghoul fever (due to a prior attack at sea from a group of lacedons), and in his fever-induced delirium, he wrecked his ship against the Crow. After returning to life as a lacedon himself, Lockerbie has lived a lonely life split between periodic hunts of the depths of Outcast Cove for meals of the drowned dead and working on his painting of Magnimar here in his lair. He spends most of his time here, using the Sea Stair two levels above to come and go and relying on stealth to sneak by devils and sinspawn along the way.
Although evil, Lockerbie is no fool—he's not eager to fight a group of adventurers, and knows that they'll likely attack him on sight. Instead, when the PCs enter, he tries to speak to them from the shadows under the bridge if he can. Lockerbie is willing to talk, and even warns the PCs of the dangers up ahead in an attempt to earn their favor before he asks a favor of his own—he reveals that he lost a valuable broach when he sunk his ship, the Liza Jane, just to the east of The Crow. If the PCs can recover his broach and then show it to him, he promises to tell them something important about what they'll encounter to the south. And if the PCs will go one step further and promise to deliver the broach to his wife (the eponymous Liza Jane) with an explanation that they found the broach in the shipwreck but found no sign of Lockerbie, he'll even agree to aid them against those dangers to the south.
Lockerbie knows about the derros further on—he's seen them dragging numerous victims through Sewer Falls. While he has no particular hatred of the derros, he figures the PCs are here to kill them. If the PCs secure his aid, Lockerbie tells them there are four derros in all, led by a witch of some sort, but that the derros seem to have some sort of growing feud. If the PCs want a better chance against the derros, they'll need to approach the southern room slowly—he suggests via the balcony accessed by the southern tunnel from Sewer Falls. This should give them a chance to observe the derros and plan an ambush.
Convincing Lockerbie that the PCs honestly intend to deliver the broach to Liza Jane Brast requires a successful DC 20 Bluff or Diplomacy check—or alternatively, some sort of proof from Liza Jane that the delivery has been made. If the PCs manage to do this for the lacedon, he'll accompany them and aid them in fighting the derros.
Lockerbie Brast - Lacedon Rogue
Utility Room
“Two picked clean skeletons wearing the rags of laborer's garb lie sprawled on the floor of this otherwise empty room.”
One skeleton still has 16 gp and a pearl worth 100 gp in the tatters of its sock, while the other clutches an ever-burning torch in one hand.
Sewer Falls
“A flight of stairs leads up to a wide stone crossing ten feet above the dark waters below in this octagonal large room. Large rusted pipes at the level of the crossing but on open sections spew dark water into the cistern below making a resounding crescendo.”
From Lockerbie, the tunnel to the east extends for about 2,400 feet, twisting and turning under Outcast Cove as it goes. The tunnel quickly gives way to a more natural cavern, often featuring 2- to 3-foot-deep pools of cold water, but otherwise leads safely all the way to Magnimar. The southern tunnel leads to spiral slope climbing up 10 feet before heading west to a balcony overlooking the Derro Vault.
Cave Moray
Derro Vault
“Blue, glowing fungus grows in numerous patches across the walls of this large chamber. To the east, a shadowy balcony overlooks the room at a height of ten feet, while in the center of the room a wide spiral stairwell descends into the darkness. A second flight of stairs descends along the western wall.”
The blue fungus gives of bright light in a 20 foot radius.
The character who carries the Shard of Pride feels a sudden urge to search a portion of the wall as soon as he gets near the south-south-west wall, gaining a +10 insight bonus on a DC 30 Perception check as the urging to proceed toward the Shard of Greed compels him forward to a secret door.
Caedimus's Laboratoy
“This twenty-foot diameter domed chamber contains a jury-rigged pair of low operating tables, complete with leather straps at both ends to hold the patients down. Doors lead off to the north-east and the south-west.”
The north-east door leads to an office (containing a great number of journals written in Undercommon) and a bedroom. The south-west door leads to all forms of specimens in jars stacked on rows of shelving.
The Carrion Golem is a hideous patchwork made of equal parts troglodyte, duergar, giant spider, and giant rat, but with the lolling head of a half-shaved dwarf bearing a gaping trepanation to the side of its skull.
Brine ZombiesCarrion GolemCaedimus - Male Derro
Alarm Raised
“Soon after the fight in Caedimus's Laboratory, the other Derro arrive. From the door on the south-west wall came Portioque and his pet Darkmantle, Atlatia and her charmed servant Fenster the Blight came from the door on the north-west wall while Magister Khrysm and her mirror image twin homonculi came from down the western stairs”
DarkmantlePortioque - Male DerroFenster The BlightAtlatia - Female DerroKhrysm's Twin HomonculiMagister Khrysm



 SHARD OF PRIDE (Major Artifact)
 SHARD OF GREED (Major Artifact)


